Except for a bit of flurries, we still haven't had any snow here. Part of that is due to the unseasonably mild temperatures we have had. However, winter is trying to make an appearance as the temperatures are finally dipping. We are supposed to have snow flurries this afternoon but not any accumulation. I am trying to be patient as I do love snow!
That being said, I created this tag using Pion Design's Days of Winter papers. I love these papers--plus I get a bit of snow in my life! If you click on the photo, you can see the details better.
Just look at that sweet scene! I began by layering some leftover scraps of paper onto a kraft tag. The Prima doily was given a coat of white Wink of Stella. A bit of crochet trim was placed at the bottom (or side, as I decided to make the scene on a side angle). Distress Glitter in Pumice Stone was placed around the image and mounted to the tag on a piece of cardboard. A couple of rhinestones were added to the upper right corner of the image. Snowflake stickers by Jolee's were added for some more sparkle. A seam binding bow and star charm finishes it off.
Well, that it for me today. I wasn't able to get in much craft time this past week, so I'm hoping to catch up a little on it today. Thank you so much for taking the time to visit my blog. I do appreciate your sweet comments. Hope you have a wonderful week ahead!
Sunday, January 17, 2016
Sunday, January 10, 2016
Angel Tag
Hi everyone! A dear friend recently gifted me with some papers from an older Graphic 45 line called Christmas Past. While the theme is geared towards Christmas, I think it is versatile enough to use for other things as well. With that in mind, I created this Angel Tag.
To see the details better, just click on the photo. I began by adhering a piece of the pattern paper to a premade tag and inked the edges. The angel was fussy cut from another sheet of the paper and placed on the tag with foam squares. Underneath the angel is a Tim Holtz Thinlits die shape. A piece of gold and cream lace trim, I believe from Prima, is attached at the bottom of the tag and also to the top of the angel image. The roses are from my stash, but the poinsettia and leaf are Prima. A few gold flat back beads were placed at the top. The tie is gold metallic ribbon from my stash. I added a touch of Stickles to the angel's wings but it is a bit difficult to see in the photo.
What are you working on now? I pulled out some stamps and my Copics this past week and tried my hand at a bit of coloring. I need to do more of this as I do enjoy it.
Wishing you a wonderful week ahead. Thanks for taking the time to visit my blog. I appreciate so much the kind comments you leave.
To see the details better, just click on the photo. I began by adhering a piece of the pattern paper to a premade tag and inked the edges. The angel was fussy cut from another sheet of the paper and placed on the tag with foam squares. Underneath the angel is a Tim Holtz Thinlits die shape. A piece of gold and cream lace trim, I believe from Prima, is attached at the bottom of the tag and also to the top of the angel image. The roses are from my stash, but the poinsettia and leaf are Prima. A few gold flat back beads were placed at the top. The tie is gold metallic ribbon from my stash. I added a touch of Stickles to the angel's wings but it is a bit difficult to see in the photo.
What are you working on now? I pulled out some stamps and my Copics this past week and tried my hand at a bit of coloring. I need to do more of this as I do enjoy it.
Wishing you a wonderful week ahead. Thanks for taking the time to visit my blog. I appreciate so much the kind comments you leave.
Sunday, January 3, 2016
New Year Mini Canvas
Hi friends. To mark the New Year 2016, I decided to alter a mini canvas that's been in my stash for awhile. When I saw the sweet Pion Design image of the child with the number 1, I thought this would be perfect as a focus on the canvas and to mark the New Year.
The canvas measures 4x4 inches. The image was adhered to the canvas with Glue N Seal. The pretty lace and ribbon trim, doily, pearl star, and pearl border strip were gifts to me. The silver star charm was attached to the blue seam binding bow and accented with a Recollections pearl. The felt snowflakes are also from Recollections.
Once the glue dried for the image, everything came together rather quickly. I enjoyed making this little canvas so much and hope you like it.
After a warm Christmas, winter has finally made an appearance here with cold, but seasonable, temperatures. However, no snow is forecasted as of yet--maybe snow flurries tomorrow. Today is a perfect day to put on a large pot of homemade chicken noodle soup with some warm, crusty bread which is my plan for today. I hope your new year is off to a good start. I just found out I won a gift certificate to Heartfelt Creations and am thrilled! It's back to work for me tomorrow after a nice long break for the holiday.
Thank you so much for taking the time to stop by. I appreciate all your kind comments. Wishing everyone good health and happiness for the new year.
The canvas measures 4x4 inches. The image was adhered to the canvas with Glue N Seal. The pretty lace and ribbon trim, doily, pearl star, and pearl border strip were gifts to me. The silver star charm was attached to the blue seam binding bow and accented with a Recollections pearl. The felt snowflakes are also from Recollections.
Once the glue dried for the image, everything came together rather quickly. I enjoyed making this little canvas so much and hope you like it.
After a warm Christmas, winter has finally made an appearance here with cold, but seasonable, temperatures. However, no snow is forecasted as of yet--maybe snow flurries tomorrow. Today is a perfect day to put on a large pot of homemade chicken noodle soup with some warm, crusty bread which is my plan for today. I hope your new year is off to a good start. I just found out I won a gift certificate to Heartfelt Creations and am thrilled! It's back to work for me tomorrow after a nice long break for the holiday.
Thank you so much for taking the time to stop by. I appreciate all your kind comments. Wishing everyone good health and happiness for the new year.
Sunday, December 27, 2015
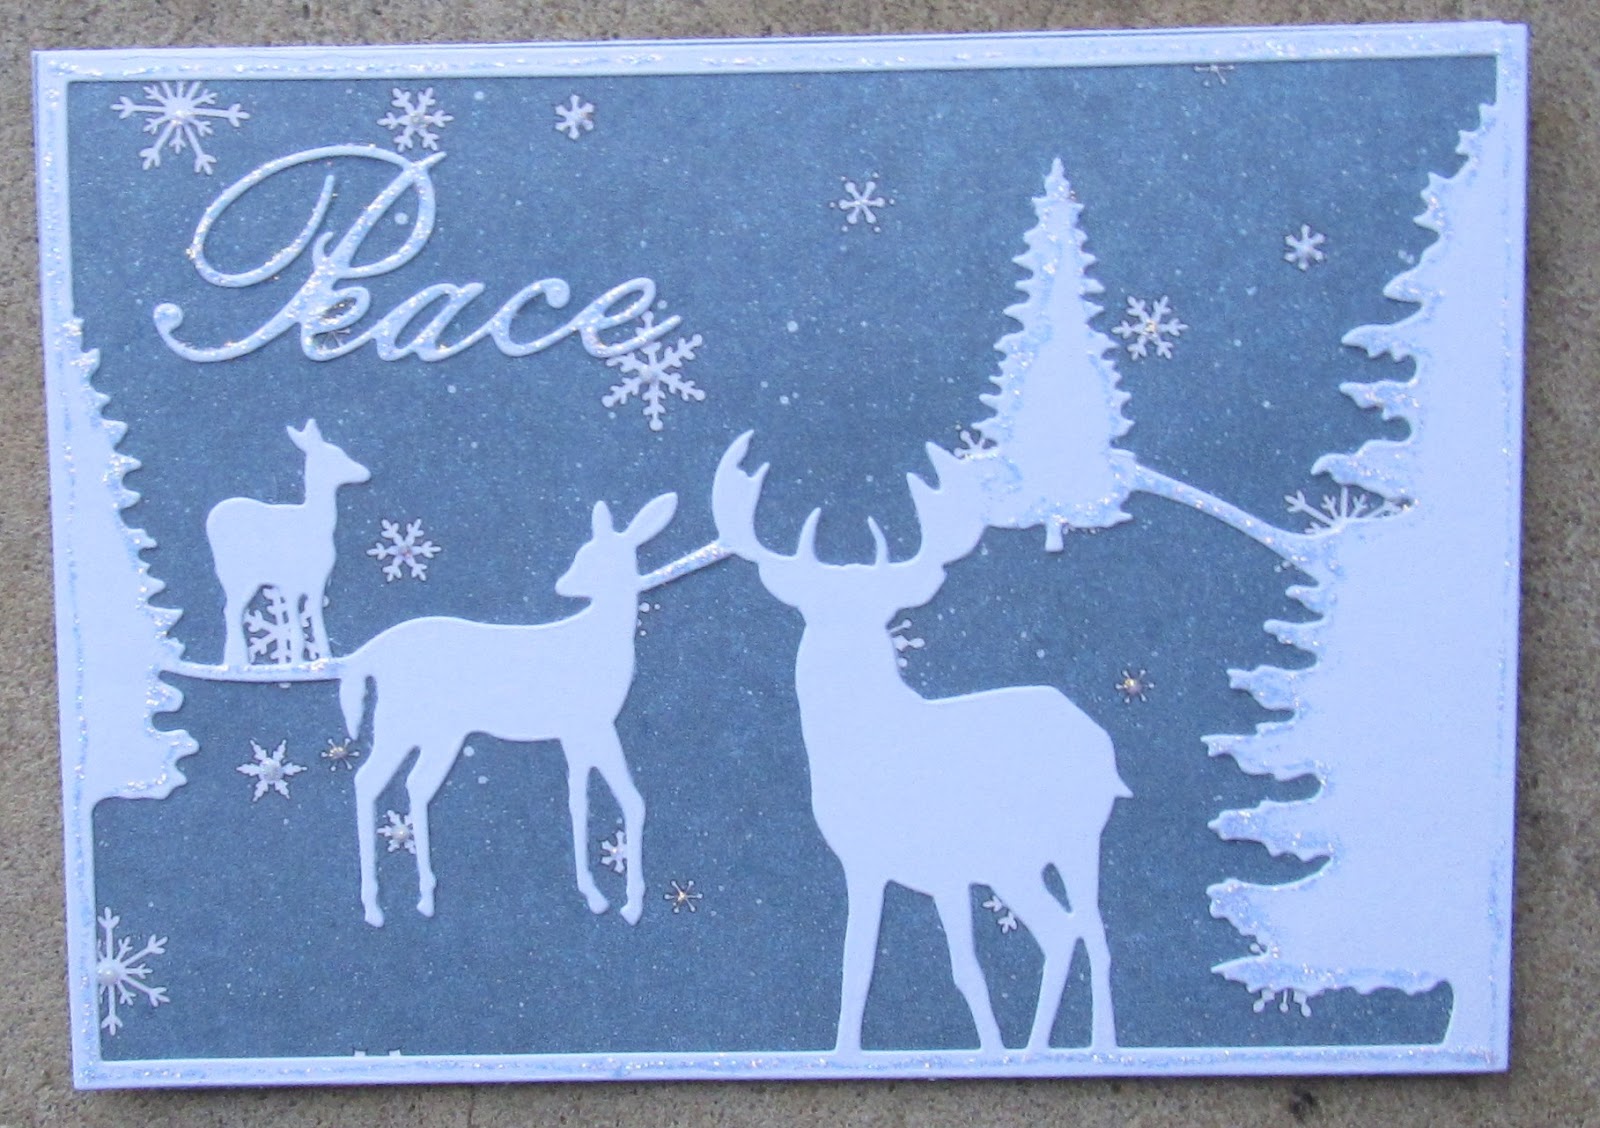
Peace
Christmas has come and gone already, and now the new year is anticipated. We didn't have a white Christmas this year; instead, we had record warm temperatures (75 degrees Fahrenheit) as well as high humidity. Not my idea of Christmas weather. If we can't have snow, it should at least be cold!
Somehow, I never seem to start making Christmas cards in enough time. The week before Christmas, I received a beautiful handmade card and some crafting goodies from my sweet blogging friend, Sharon. Among the items she sent was a Peace die. What perfect timing this was! I knew immediately that I would make several cards featuring this word die. Here are some of the cards I made.
Last week, I shared cards I made using the Tim Holtz Tattered Poinsettia die. I received the matching embossing folders in the mail just before Christmas, so I was able to emboss the poinsettia leaves. I highlighted them with Inka Gold and some Recollections gold beads. I used some gold Stickles on the word Peace. Another friend, ReNae, was kind enough to send me some cardstock embossed with the poinsettia pattern which I used on the background.
Here is the poinsettia cut and embossed on pattern paper with the edges inked in brown and the veins highlighted in Inka Gold. Martha Stewart rhinestones were used in the center.
Both cards are shown side by side so you can see the subtle differences in the two.
The scene on this card was made with a Sizzix die and adhered to snowflake pattern paper. I used some diamond Stickles to highlight the edges.
Last, but not least, is a card similar to the ones I shared in my previous post. The background paper is from the same My Mind's Eye collection I used in those cards (love those papers). The wreath die is Memory Box, the fern branches are Tim Holtz, and the pearls are Recollections.
As you can see, I was able to use the Peace die quite a bit and am looking forward to more projects with it. I spent some time just cutting out a lot of shapes with different dies which made assembling the cards much easier than doing one by one.
Thank you for reading through this rather long post! I want to take the time to wish everyone a very Happy New Year filled with good health and happiness. I appreciate your visits to my blog and the sweet comments you leave.
Somehow, I never seem to start making Christmas cards in enough time. The week before Christmas, I received a beautiful handmade card and some crafting goodies from my sweet blogging friend, Sharon. Among the items she sent was a Peace die. What perfect timing this was! I knew immediately that I would make several cards featuring this word die. Here are some of the cards I made.
Last week, I shared cards I made using the Tim Holtz Tattered Poinsettia die. I received the matching embossing folders in the mail just before Christmas, so I was able to emboss the poinsettia leaves. I highlighted them with Inka Gold and some Recollections gold beads. I used some gold Stickles on the word Peace. Another friend, ReNae, was kind enough to send me some cardstock embossed with the poinsettia pattern which I used on the background.
Here is the poinsettia cut and embossed on pattern paper with the edges inked in brown and the veins highlighted in Inka Gold. Martha Stewart rhinestones were used in the center.
Both cards are shown side by side so you can see the subtle differences in the two.
The scene on this card was made with a Sizzix die and adhered to snowflake pattern paper. I used some diamond Stickles to highlight the edges.
Last, but not least, is a card similar to the ones I shared in my previous post. The background paper is from the same My Mind's Eye collection I used in those cards (love those papers). The wreath die is Memory Box, the fern branches are Tim Holtz, and the pearls are Recollections.
As you can see, I was able to use the Peace die quite a bit and am looking forward to more projects with it. I spent some time just cutting out a lot of shapes with different dies which made assembling the cards much easier than doing one by one.
Thank you for reading through this rather long post! I want to take the time to wish everyone a very Happy New Year filled with good health and happiness. I appreciate your visits to my blog and the sweet comments you leave.
Sunday, December 20, 2015
Poinsettia Cards
I have been working on trying to make a number of Christmas cards in a short amount of time. It would have helped if I had started the process earlier! My goal for next year is to make at least one Christmas card a month in an effort to avoid making them in a rush come December.
The cards I'm sharing today both use the Tim Holtz Tattered Poinsettia die and the Catalina Wreath die by Memory Box. The word "noel" is a Tim Holtz die, and the leaves were made with a Prima die. I simply added glitter to all the diecuts. Stamens were used for the centers of the poinsettias. Background papers are from an older line of My Mind's Eye (I love this glittered stack). Pearls are by Recollections.
I did try to mark veins onto the poinsettia petals but it doesn't really show up once the glitter was added.
For the second card, I simply changed the background paper and added snowflakes instead of the pearls. I also inked the edges of each diecut to give them a more aged look.
If you click on each photo, you can see the details a bit better.
Here are both cards side by side so you can see the difference. I really enjoyed making these cards. It was a fairly easy process.
I found out there was an embossing folder made for the poinsettia die. I tracked it down at Sizzix, and it arrived Friday evening. Needless to say, I cut out a few more poinsettias and embossed them. I'll share those in the next post.
Well, dear blog followers, in case I don't get a chance to post again this week, I want to wish all who celebrate a Merry Christmas. Thank you so much for taking the time to stop by. I appreciate your kind comments.
The cards I'm sharing today both use the Tim Holtz Tattered Poinsettia die and the Catalina Wreath die by Memory Box. The word "noel" is a Tim Holtz die, and the leaves were made with a Prima die. I simply added glitter to all the diecuts. Stamens were used for the centers of the poinsettias. Background papers are from an older line of My Mind's Eye (I love this glittered stack). Pearls are by Recollections.
I did try to mark veins onto the poinsettia petals but it doesn't really show up once the glitter was added.
For the second card, I simply changed the background paper and added snowflakes instead of the pearls. I also inked the edges of each diecut to give them a more aged look.
If you click on each photo, you can see the details a bit better.
Here are both cards side by side so you can see the difference. I really enjoyed making these cards. It was a fairly easy process.
I found out there was an embossing folder made for the poinsettia die. I tracked it down at Sizzix, and it arrived Friday evening. Needless to say, I cut out a few more poinsettias and embossed them. I'll share those in the next post.
Well, dear blog followers, in case I don't get a chance to post again this week, I want to wish all who celebrate a Merry Christmas. Thank you so much for taking the time to stop by. I appreciate your kind comments.
Sunday, December 13, 2015
Christmas Tag and Flat Cards for Mailing
Hi friends! Is everyone ready for the holidays or getting a bit frantic like me in squeezing in enough time to make cards and everything else? I always promise myself to start earlier to avoid the last minute crunch, but it never seems to work that way. I think my New Year's resolution will be to make one Christmas card a month so I at least have some on hand.
First up today is a Christmas tag that I needed to put together quickly to get in the mail last week. I began with a premade Martha Stewart tag and just embellished it.
All things used have been sitting in my stash for quite awhile. The Noel stickers are from Jolee's, the rosette is from K&Co, and the star and rhinestones are from Michael's. I used some red Stickles on the holly berries and added some ribbon and baker's twine to the top.
Next up are two cards that I needed to be flat enough for mailing internationally to cut down on the cost. Both cards use a beautiful Sizzix die sentiment as the focal point. The first card is made from an older line of K&Co glittered papers. The snowflake stickers are Jolee's and the bird sticker is K&Co. A piece of lace trim and Recollections silver and white twine finishes it off.
The last card was made with paper from The Paper Studio's Old World Winter line (love it). I just added some red trim, rhinestones and stars as accents.
These two cards really came together quickly and were good for mailing without being bulky. I do, however, love more dimension and frills on my cards!
Well, I better get back to crafting. Time is running out! I've been working on diecuts and glitter this weekend and having so much fun. Thank you so much for stopping by at this busy time of year. I appreciate the nice comments you leave. Have a wonderful week ahead!
First up today is a Christmas tag that I needed to put together quickly to get in the mail last week. I began with a premade Martha Stewart tag and just embellished it.
All things used have been sitting in my stash for quite awhile. The Noel stickers are from Jolee's, the rosette is from K&Co, and the star and rhinestones are from Michael's. I used some red Stickles on the holly berries and added some ribbon and baker's twine to the top.
Next up are two cards that I needed to be flat enough for mailing internationally to cut down on the cost. Both cards use a beautiful Sizzix die sentiment as the focal point. The first card is made from an older line of K&Co glittered papers. The snowflake stickers are Jolee's and the bird sticker is K&Co. A piece of lace trim and Recollections silver and white twine finishes it off.
The last card was made with paper from The Paper Studio's Old World Winter line (love it). I just added some red trim, rhinestones and stars as accents.
These two cards really came together quickly and were good for mailing without being bulky. I do, however, love more dimension and frills on my cards!
Well, I better get back to crafting. Time is running out! I've been working on diecuts and glitter this weekend and having so much fun. Thank you so much for stopping by at this busy time of year. I appreciate the nice comments you leave. Have a wonderful week ahead!
Sunday, December 6, 2015
Glistening Season Tag
Hi friends! Have you noticed how much I love Pion Design papers? Today, I have a tag to share using paper from their Glistening Season collection.
Using a premade kraft tag, I adhered a piece of the paper to it. I love the winter church and deer scene, so I brought attention to it by placing a chipboard postage stamp frame that I glittered around it. I tucked in another piece of pattern paper behind the frame and cut a border sentiment to place at the bottom. A piece of lace accented with a twine bow and Maya Road bauble was added to the bottom. I used a couple of Martha Stewart punches for the snowflakes and added rhinestones from Recollections. A piece of twill finished the top.
And there you have it. Very easy to make. If you click on each image, you can see the details better. I have been using this line to make quite a few tags.
Well, that's it for me today. I really appreciate your kind comments and thank you so much for stopping by. Have a wonderful week ahead!
Using a premade kraft tag, I adhered a piece of the paper to it. I love the winter church and deer scene, so I brought attention to it by placing a chipboard postage stamp frame that I glittered around it. I tucked in another piece of pattern paper behind the frame and cut a border sentiment to place at the bottom. A piece of lace accented with a twine bow and Maya Road bauble was added to the bottom. I used a couple of Martha Stewart punches for the snowflakes and added rhinestones from Recollections. A piece of twill finished the top.
And there you have it. Very easy to make. If you click on each image, you can see the details better. I have been using this line to make quite a few tags.
Well, that's it for me today. I really appreciate your kind comments and thank you so much for stopping by. Have a wonderful week ahead!
Subscribe to:
Posts (Atom)